DNS tunnels in the Hiddify app: Soar, DNSTT and MasterDNS
When almost everything is blocked but DNS still works, the Hiddify app can carry your traffic inside DNS queries. This page explains what a DNS tunnel is, when it helps, and answers a frequent question: where do I add resolvers?


Written for Hiddify app 5.5
The screenshots come from Hiddify app 5.5 on Android. The profile edit page is the same on computers (Windows, macOS, Linux).
What is a DNS tunnel?
- A DNS resolver is the server that turns site names into addresses, like Google's
8.8.8.8or Cloudflare's1.1.1.1. On most networks, asking a resolver still works even when everything else is blocked. - The app puts your data inside these queries. The resolver carries them to your tunnel server (because the server owns the tunnel domain), and the server connects you to the open internet.
- The data is encrypted; the resolver and the filter only see ordinary DNS queries.
It is slow
Each DNS query carries only a little data, so a DNS tunnel is much slower than a normal proxy, and it carries TCP only (voice calls and games that need UDP do not work). Use it only when nothing else connects.
Three DNS tunnels in the Hiddify app


Which one should you use? The one your server runs. You get its link from the server owner and add it like any other link (+ → Clipboard). If your own server is Hiddify Manager 13 or later, it can make DNSTT and MasterDNS tunnels.
Where do I add resolvers?
The app has no separate "add resolver" screen: resolvers are part of the profile itself. There are three ways:


Whichever way the resolvers come in, the app tests them all and uses only those that really answered; if one stops working, it is set aside and the next one takes its place. So listing a few extra resolvers does no harm.
Way 1: in the profile link
Whoever makes the link writes the resolvers in it. If you make the link yourself, or want to change it before adding it, find this part:


- Soar and MasterDNS:
resolvers=8.8.8.8,1.1.1.1 - DNSTT:
resolver=8.8.8.8,1.1.1.1(no s)
Way 2: automatic
If the link has no resolvers, or says resolvers=auto instead of a list, the app finds resolvers itself: the device's own, a ready list for your country (Iran, China and Russia), and public resolvers. It takes the country from Region in the routing settings, or from country=ir in the link. resolvers=8.8.8.8,auto means "this resolver, plus automatic finding".
Way 3: edit by hand in the app
For a profile you have already added:
-
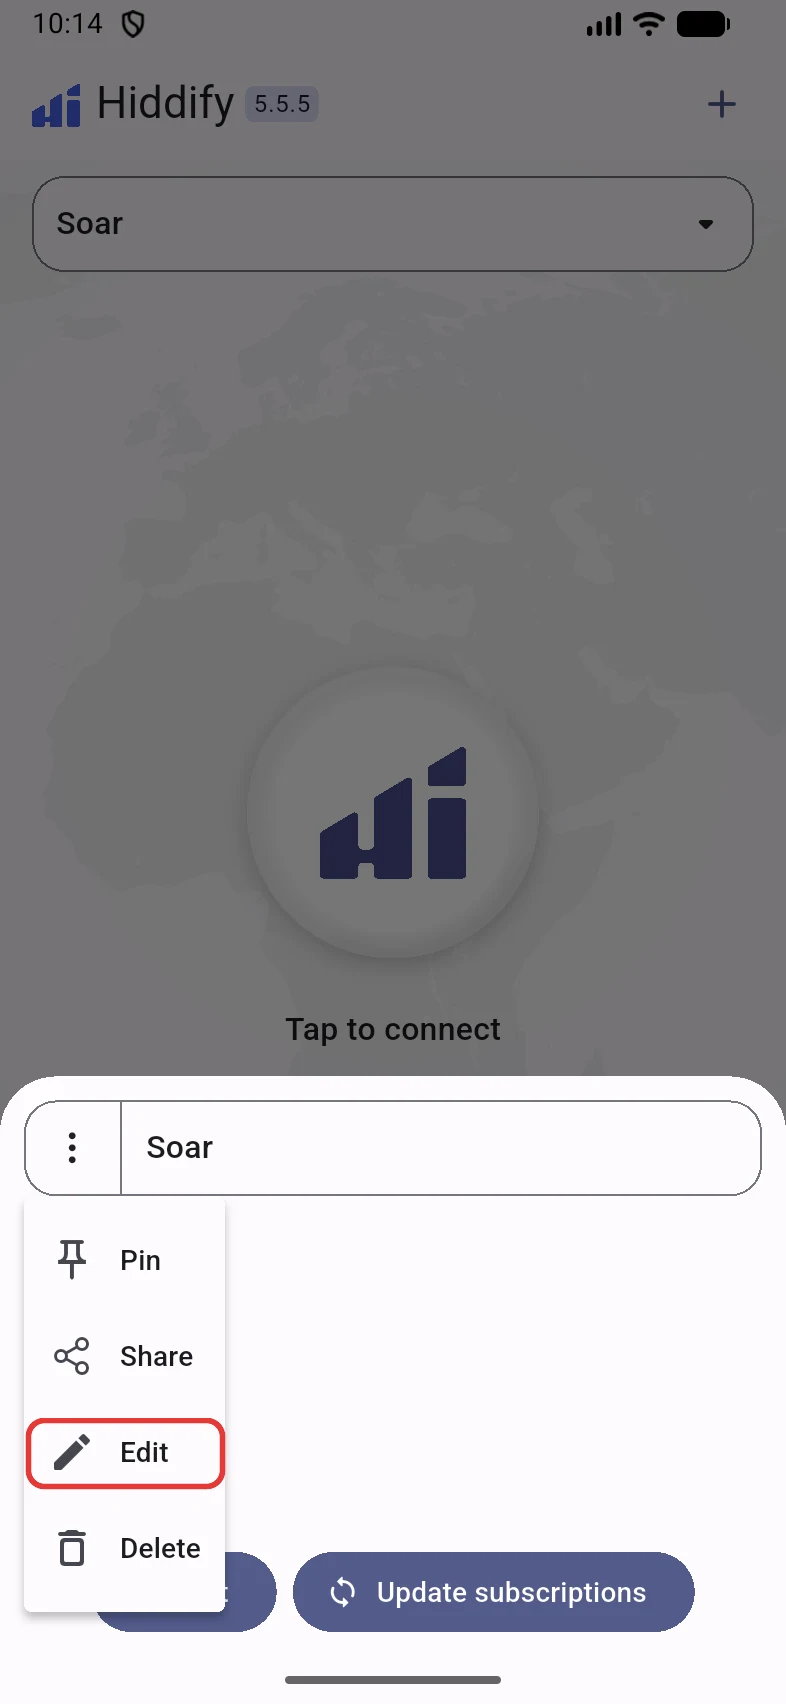
On the home screen, tap the profile name to open the profile list, tap ⋮ next to the profile and choose Edit.
-
In the Config Editor, open
outbounds→0→resolvers. Tap ⋯ next toresolvers, then Append and String: an empty line is added.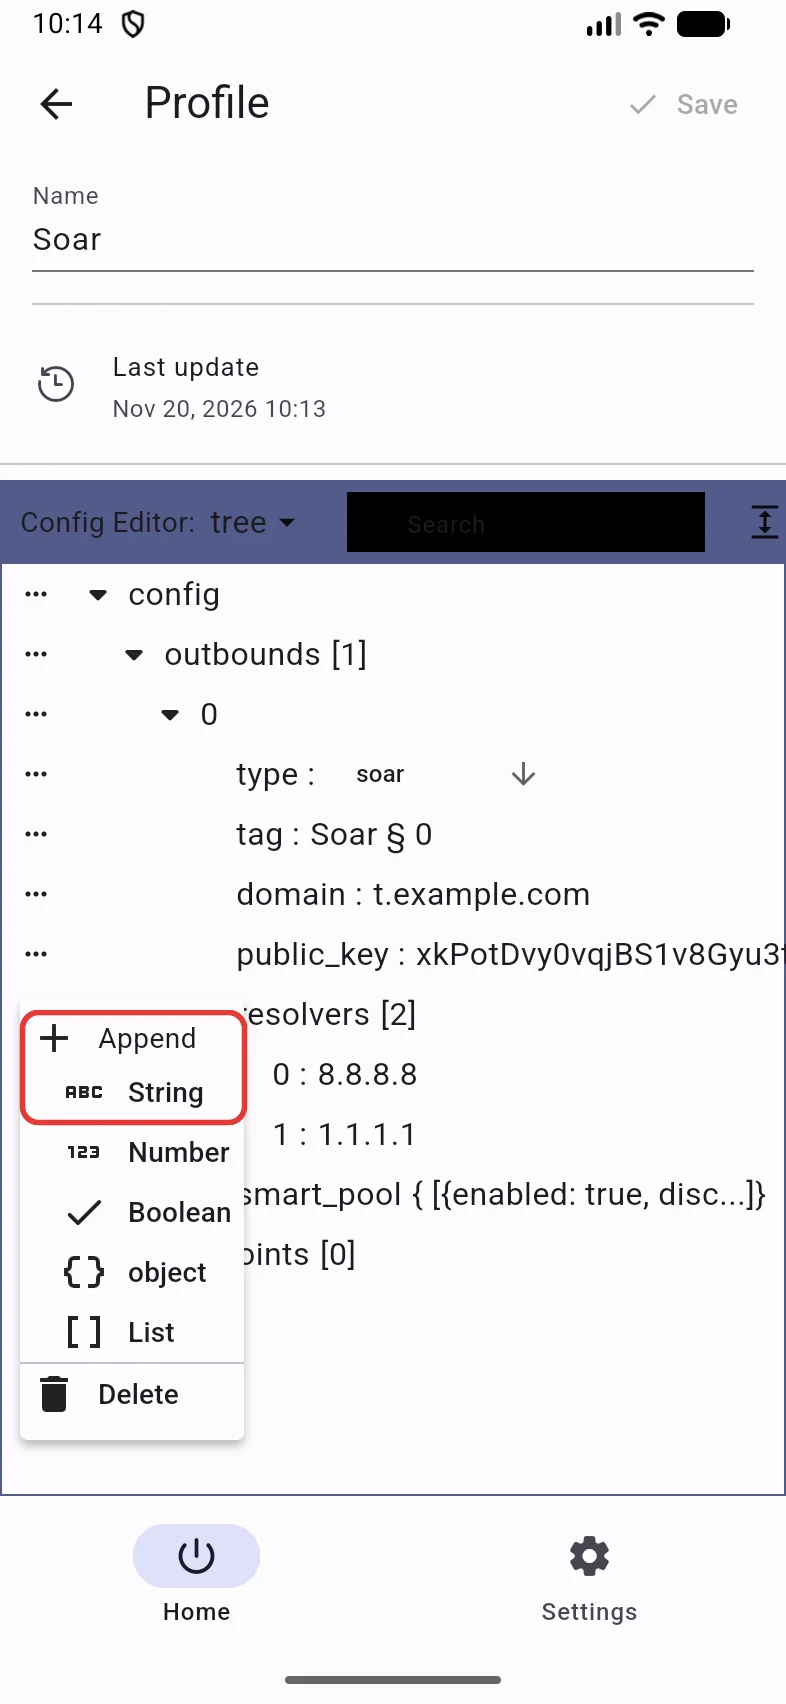
-
The easiest way to type the address: in the tree menu above the editor, choose text. The whole config is now text: type the address inside the empty
"", for example"9.9.9.9". Every address is in quotes and separated from the next by a comma. You can also delete a resolver or add"auto".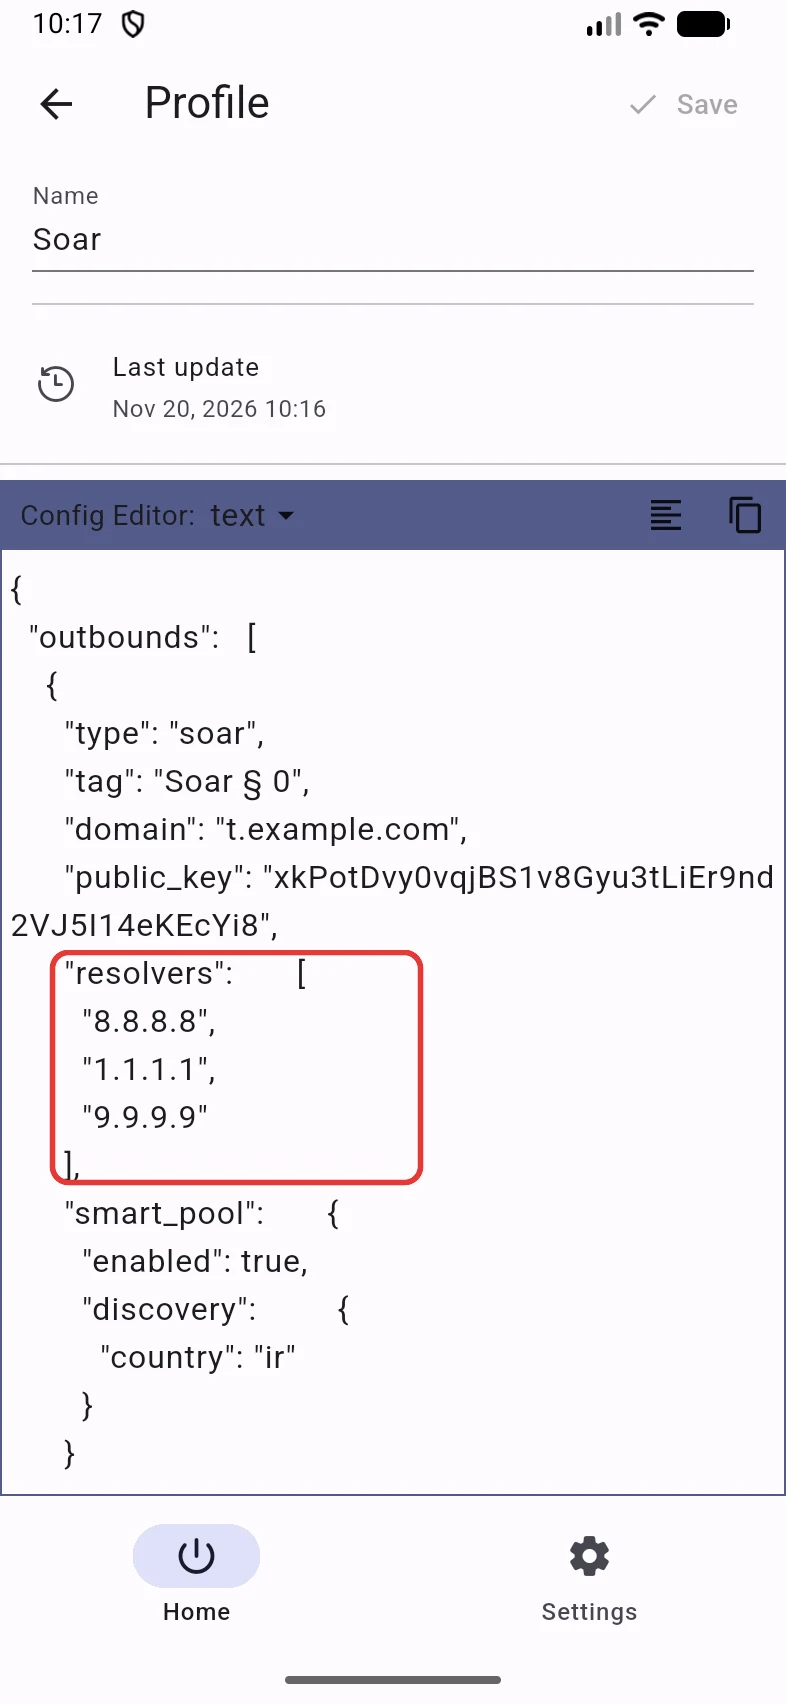
-
Tap Save at the top. Profile saved appears.
Subscription profiles
If this profile came from a subscription link, the next update of the subscription may wipe your edit. In that case, ask the server owner to put the resolvers in the link itself.
A few tips
- Which resolvers? Start with
auto; the app finds the best ones itself. If on your network only domestic resolvers answer (for example your operator's), add them next toauto. - Doesn't connect? First make sure a normal proxy really does not work; then add a few more resolvers or set
auto. If no resolver forwards the tunnel domain's queries to the server, a DNS tunnel cannot help.
For experts
- A resolver can be
8.8.8.8or1.1.1.1:5353. With the smart resolver pool (on by default),tcp://, DoT (dot://host:853) and DoH (https://host/dns-query) work too. - Every setting of each tunnel, including the smart pool and automatic finding: Soar, DNSTT, MasterDNS and the smart resolver pool.