Chain: Extra security and Proxy unblocker (WARP and Psiphon)
The Hiddify app can put a second free tunnel, WARP or Psiphon, in front of or behind your own profile. This is called the chain. It has two optional layers:
- Extra security: your traffic leaves through WARP or Psiphon after your proxy. Use it when you don't trust the proxy, for example a public or free config: the proxy's owner can't see your traffic, and sites see the IP of WARP or Psiphon, not of the proxy.
- Proxy unblocker: your proxy is reached through WARP or Psiphon. Use it when your own (personal) proxy is filtered: the unblocker gets the connection past the filter.
Written for Hiddify app 5.9
This page is for Hiddify app 5.9 (5.9.2). The screenshots come from Android; the options are the same on every platform. For the free WARP profile itself, see How to use WARP in the Hiddify app.
The quick way: Quick settings
On the Home page, tap Quick settings at the bottom.
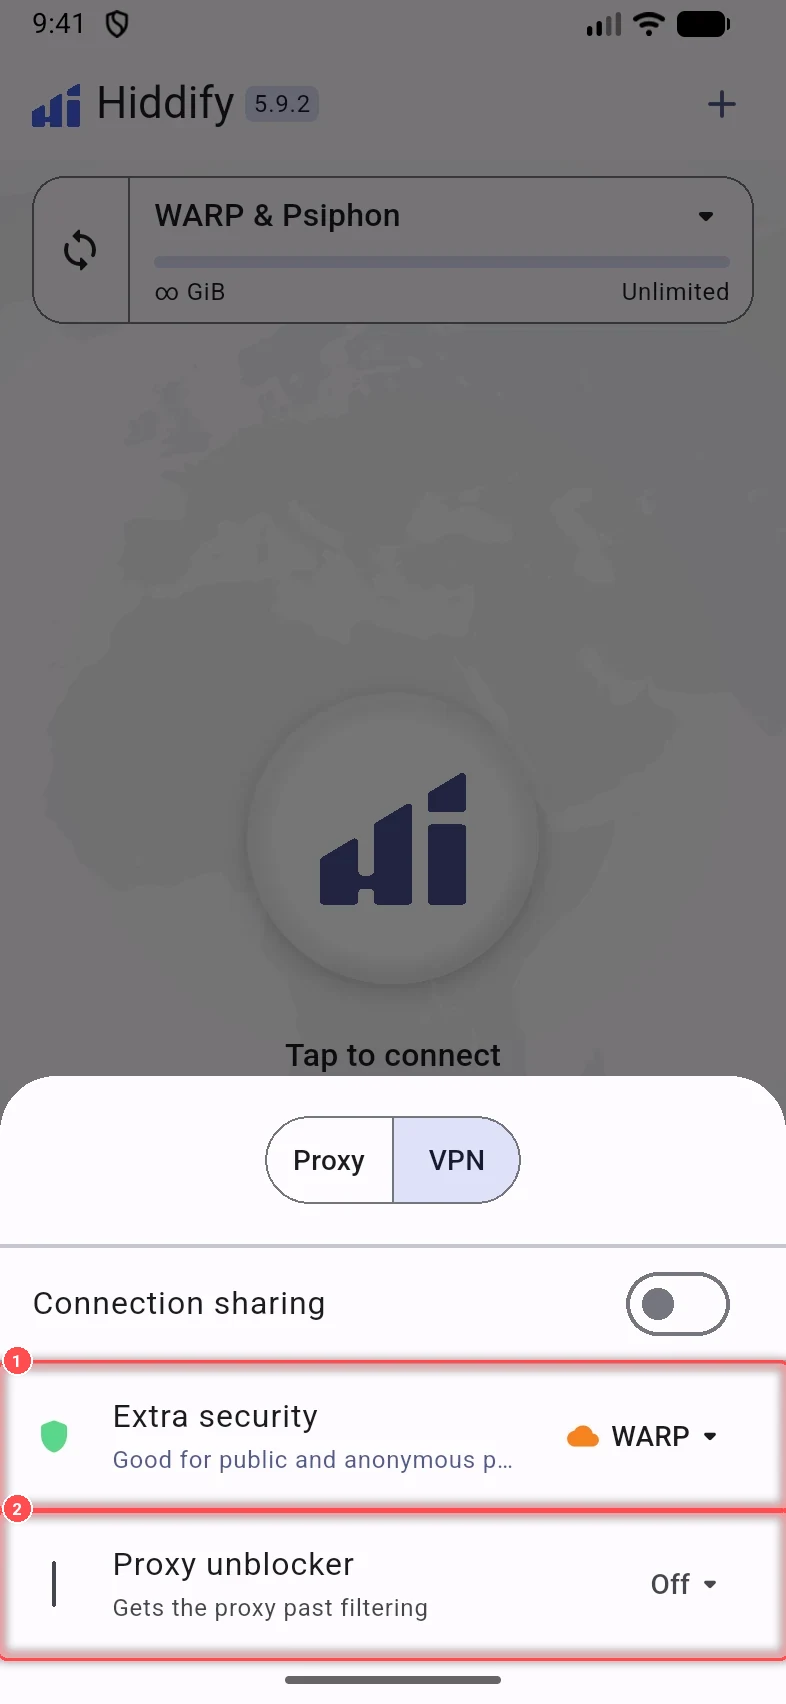
- Extra security ("When you don't trust the proxy"). Once it is on, the line under it says who sets your IP, for example Your IP is set by WARP.
- Proxy unblocker ("Gets the proxy past filtering").
Tap the value on the right of either one to choose Turn off, Psiphon or WARP. Configuration opens the Chain page with all the options.
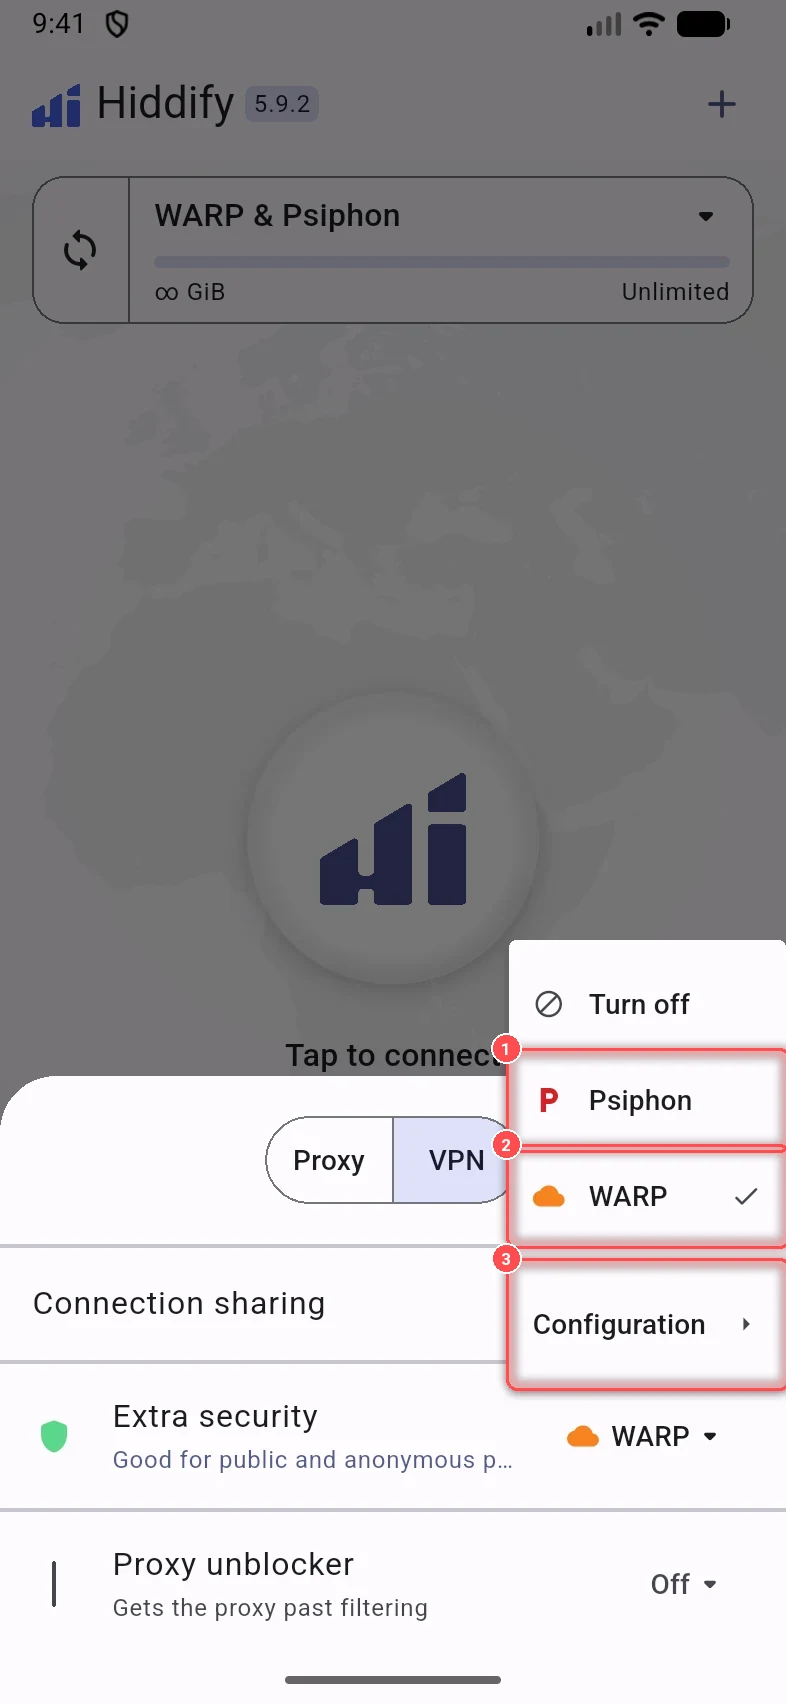
The first time you choose WARP or Psiphon, the app shows its terms (Cloudflare WARP consent or Psiphon license agreement); accept them to continue.
The Chain page
Open Settings → Chain (Extra security & unblocker). It shows the path of your traffic from top to bottom:
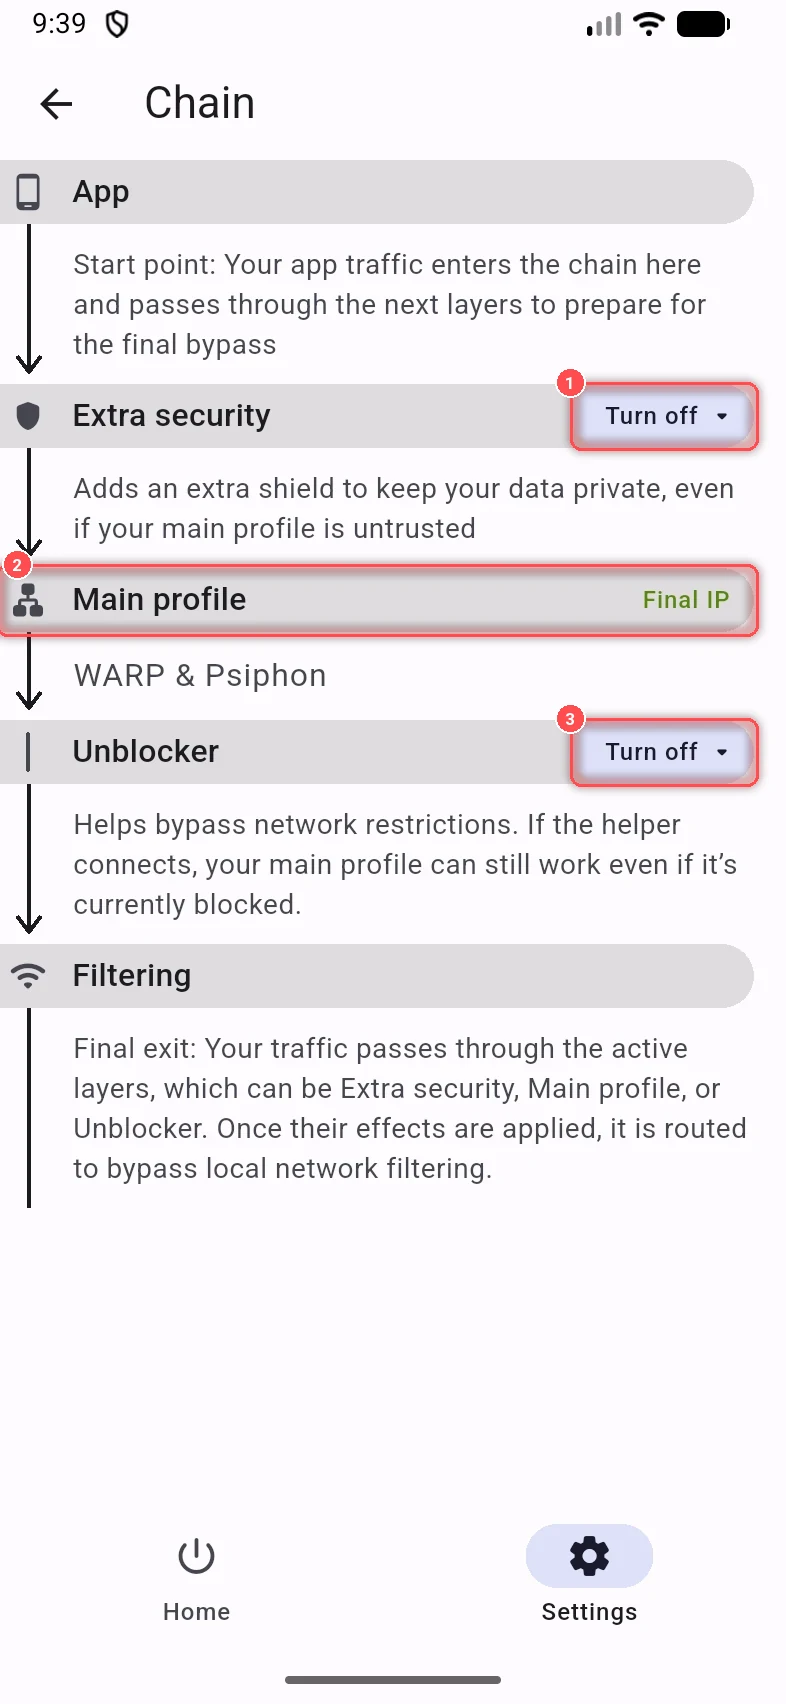
- App: your apps' traffic enters the chain here.
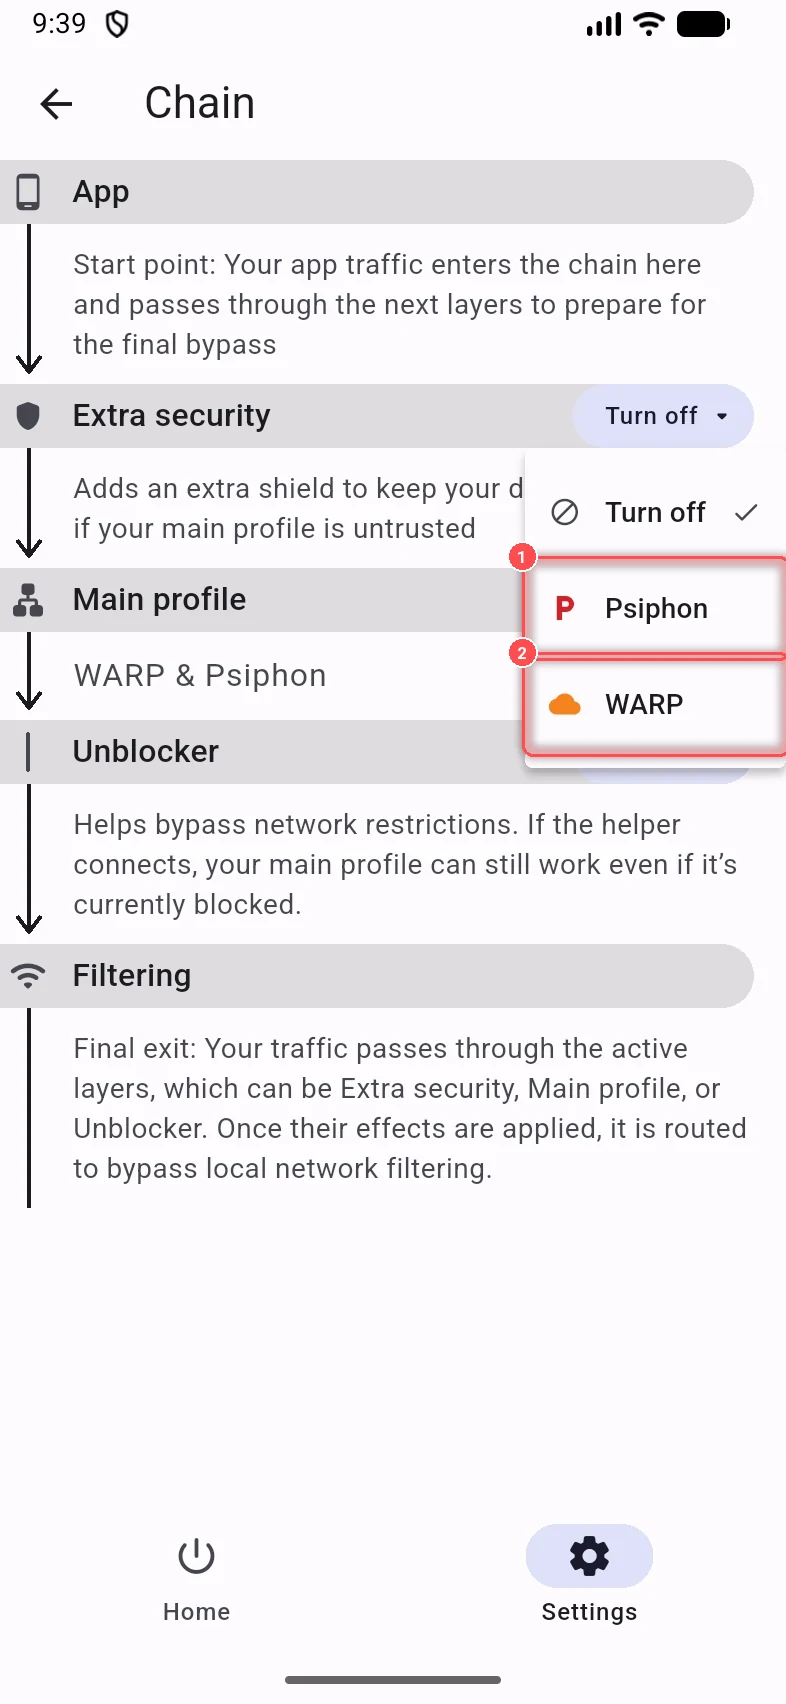
- Extra security (1): off, Psiphon or WARP.
- Main profile (2): your active profile.
- Unblocker (3): off, Psiphon or WARP.
- Filtering: the traffic leaves for the internet.
The green Final IP label shows which layer's IP the sites will see.
Which one should I use?
- A public or free config you don't trust → Extra security. It may reduce speed.
- Your own config that is filtered → Proxy unblocker. It is only useful for a personal proxy, not for public ones, and makes the proxy a bit slower.
- You can use both at once.
WARP options
When a layer is set to WARP, its options appear under it:
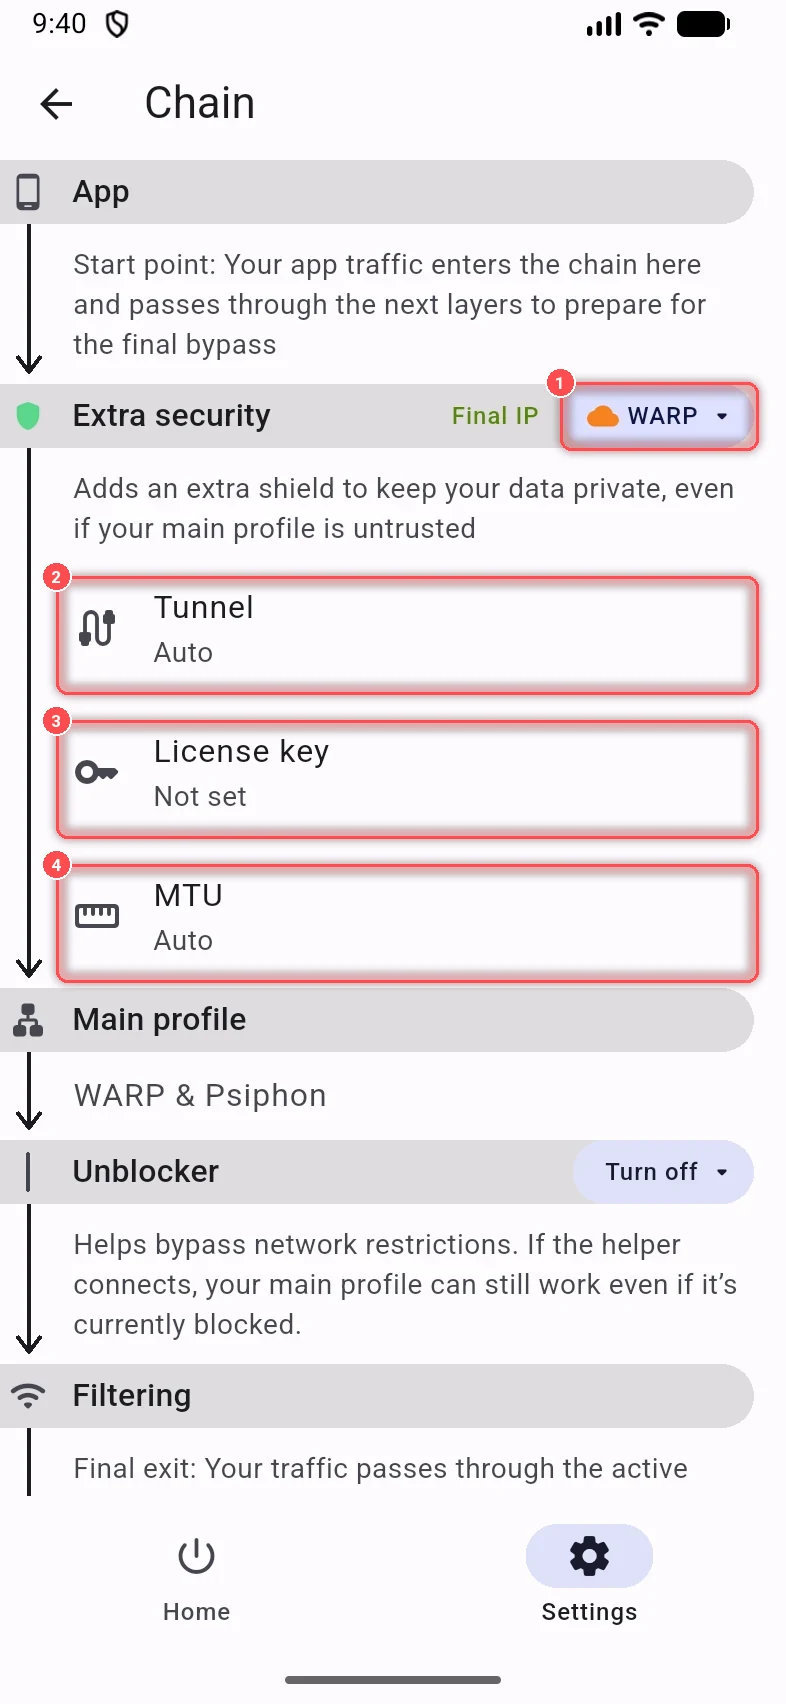
- WARP is selected; Final IP moves to this layer.
- Tunnel: how WARP connects: Auto, WireGuard, AmneziaWG or MASQUE. Leave Auto unless WARP does not connect on your network.
- License key: a WARP+ key, if you have one. Free WARP needs none.
- MTU: leave it on Auto.
With a set tunnel type, more options appear:
- WireGuard: Endpoint (Assigned by Cloudflare, Scan to find a working address, or Custom), Clean IP, Port, and WireGuard noise (noise count, mode, size and delay; modes such as Standard, Random, QUIC, DNS, SIP or STUN) to make the connection harder to detect. The Scanner has its own options (max RTT, timeout, how many addresses, ports and ranges).
- AmneziaWG: the junk packet options (Junk packets, Min junk size, Max junk size).
- MASQUE: HTTP version, server name, IPv6, UDP and keepalive timings, TLS fragment and Encrypted Client Hello (ECH).
For Psiphon you can Select server region (Auto, or a country).
If WARP or Psiphon does not connect, try another Tunnel, or switch the layer to the other provider.