How to use GCore CDN on Cloudflare registered domain
Cloudflare is sometimes disrupted in Iran. One alternative is Gcore's CDN. In this tutorial your domain's DNS stays on Cloudflare, and only one subdomain (for example gcore.yourdomain.com) is handed to Gcore with a CNAME record.
Before you start, you need an active domain on Cloudflare. See How to use Cloudflare CDN.
Cost
According to Gcore's pricing page, the pay-as-you-go (PAYG) plan includes 1 TB of free CDN traffic a month; more than that is paid. Prices can change, so check that page before you start.
1. Make an account and a CDN resource on Gcore
- Make an account on the Gcore website and open the dashboard.
-
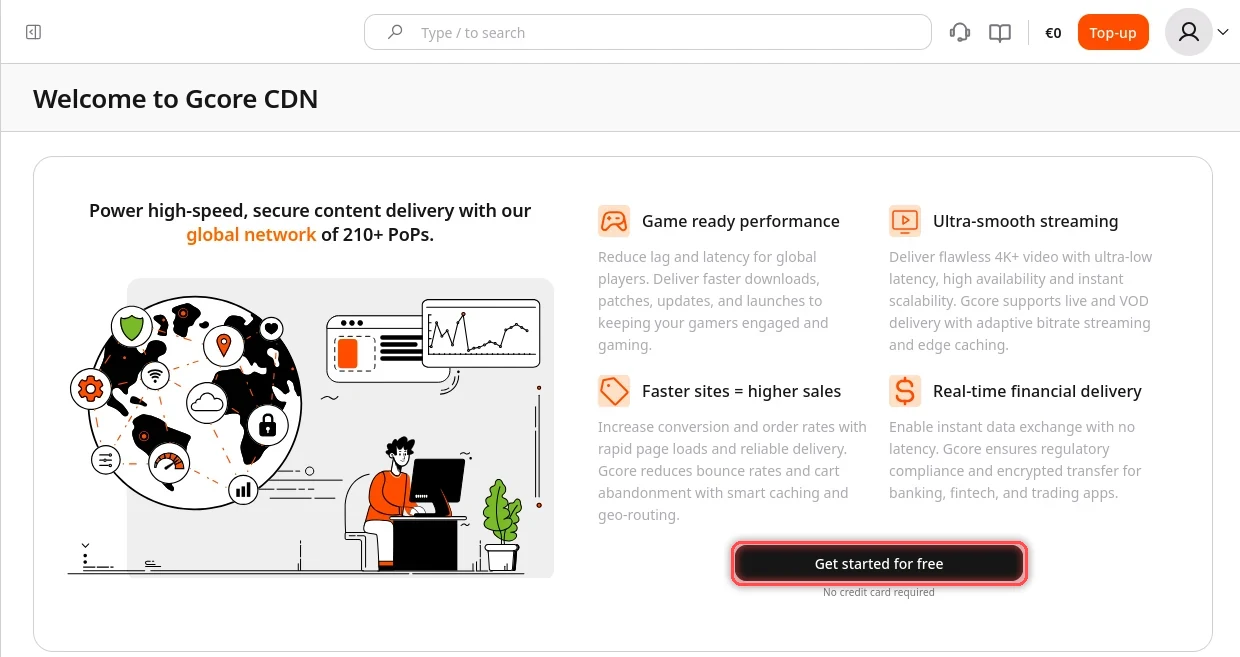
Open CDN in the side menu. The first time, you see Welcome to Gcore CDN: click Get started for free (no credit card needed).
-
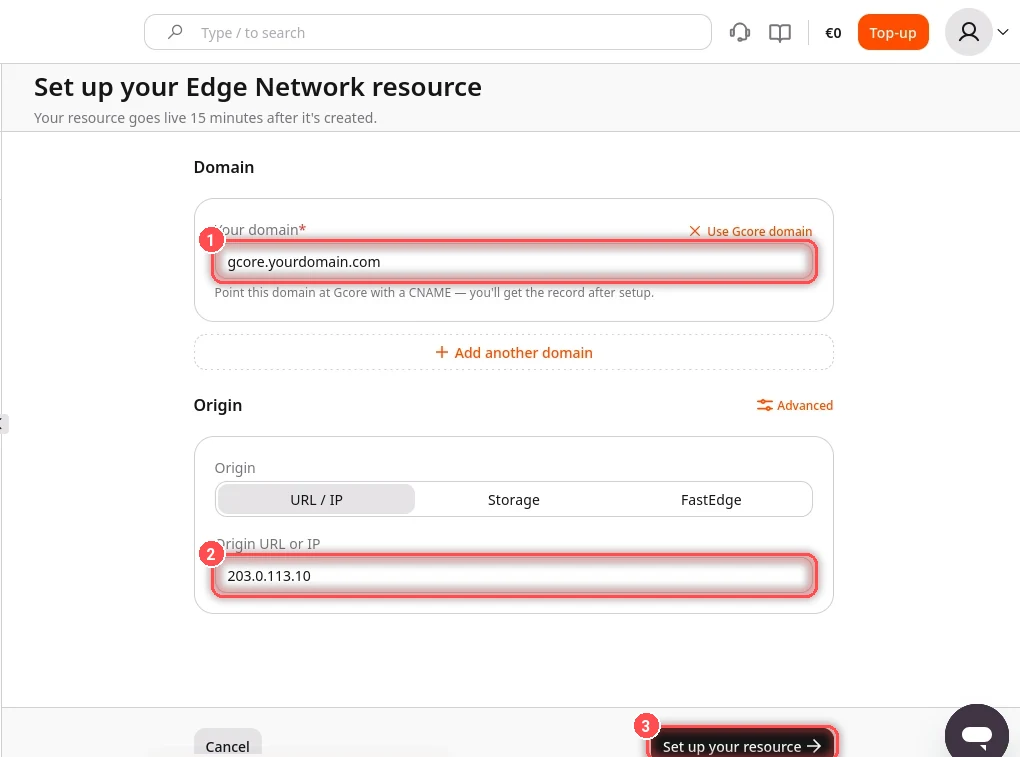
The Set up your Edge Network resource form opens:
- Under Domain, click Use your own domain and type your subdomain, for example
gcore.yourdomain.com. - Under Origin, choose URL / IP and enter your server's IP.
- Under Domain, click Use your own domain and type your subdomain, for example
-
Click Set up your resource.
-
You see Edge Network resource is created!. The DNS change required box shows the
CNAMErecord you need: Host is your subdomain and Value looks likecl-xxxxxxxx.gcorecdn.com. Copy the Value.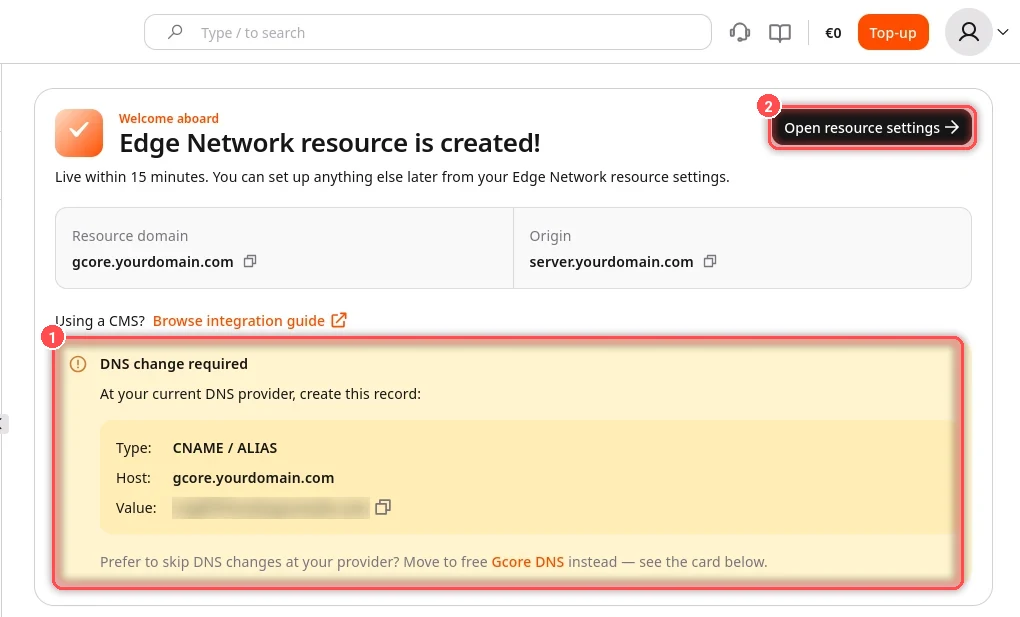
2. Make the CNAME record on Cloudflare
- On Cloudflare, select the domain, go to DNS > Records and click Add record.
-
Fill it in like this and click Save:
- Type:
CNAME - Name: the subdomain, for example
gcore - Target: the value you copied from Gcore
- Proxy status: off (DNS only, grey cloud). If it is on, the traffic goes through Cloudflare instead of Gcore.
- Type:
-
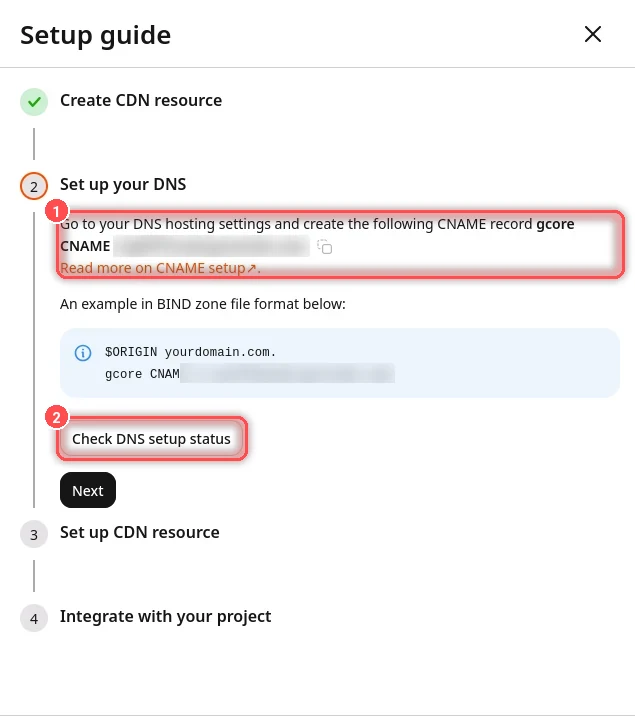
On Gcore, in the resource's Setup guide (at the top of the resource settings), click Check DNS setup status. When you see DNS record has been successfully set up, the DNS is right. This can take up to 24 hours.
3. Set up the CDN resource on Gcore
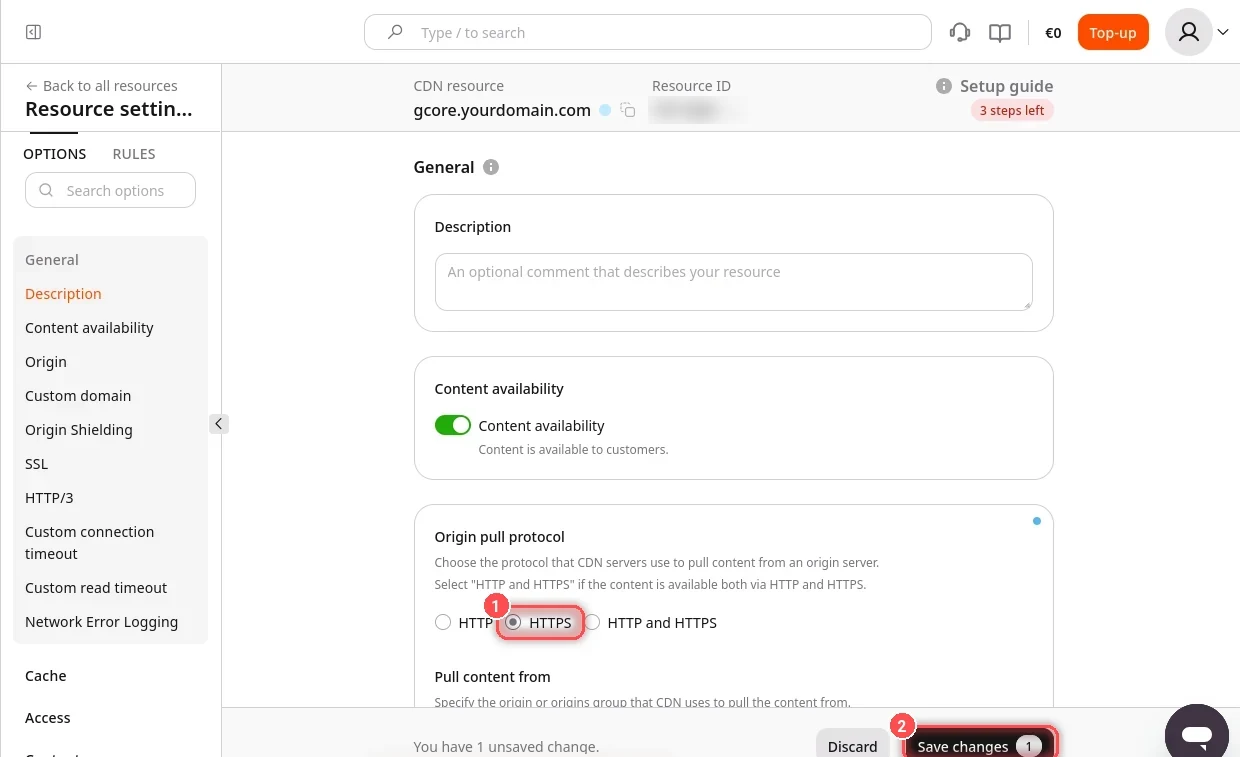
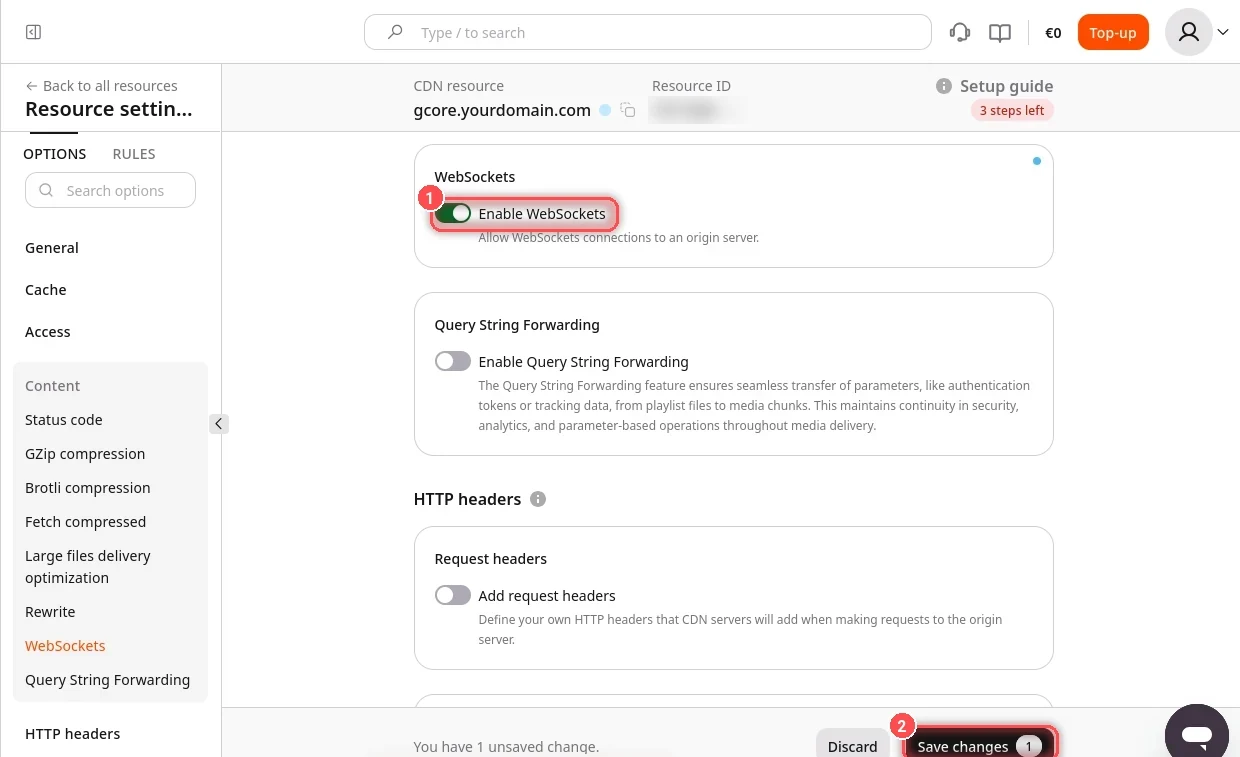
On the same page click Open resource settings (or open the resource from CDN > CDN resources) and set these three things. Click Save changes after each change; applying it on all Gcore servers takes about 15 minutes.
-
Protocol to your server: in the OPTIONS tab > General, under Origin pull protocol, choose HTTPS.
-
SSL certificate: in the SSL section, turn on Enable HTTPS, choose Free Let's Encrypt certificate and click Get SSL certificate. Issuing takes up to 15 minutes and only works once the
CNAMErecord from step 2 is right.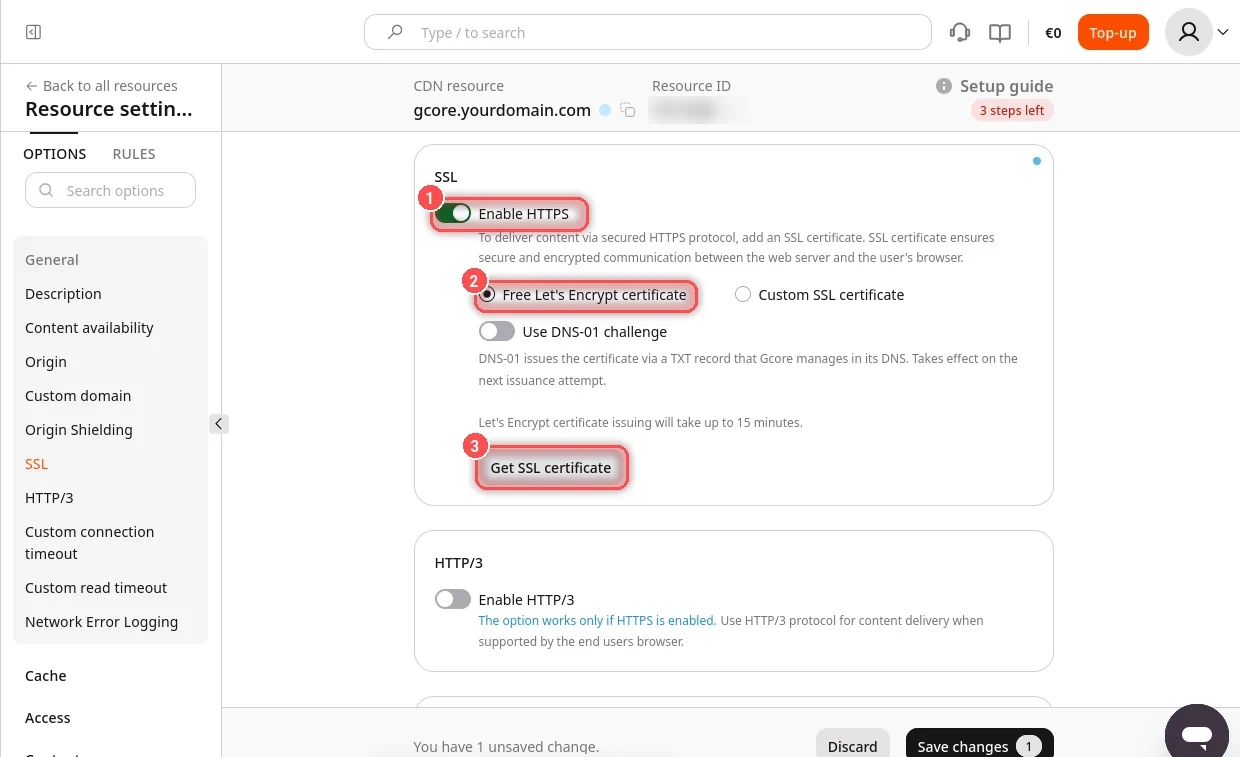
-
WebSockets: in Content > WebSockets, turn on Enable WebSockets and click Save changes. It is off by default, and WebSocket configs don't connect without it.
WAAP protection
Gcore turns on WAAP protection for a new resource in "monitoring mode". If you later switch it to blocking, WebSocket connections may be refused with a 403 error.
4. Add the subdomain to HiddifyManager
- In the panel side menu, in the Settings group, open Domains and click Add domain.
- In the Domain step, enter the subdomain (for example
gcore.yourdomain.com) and click Check. -
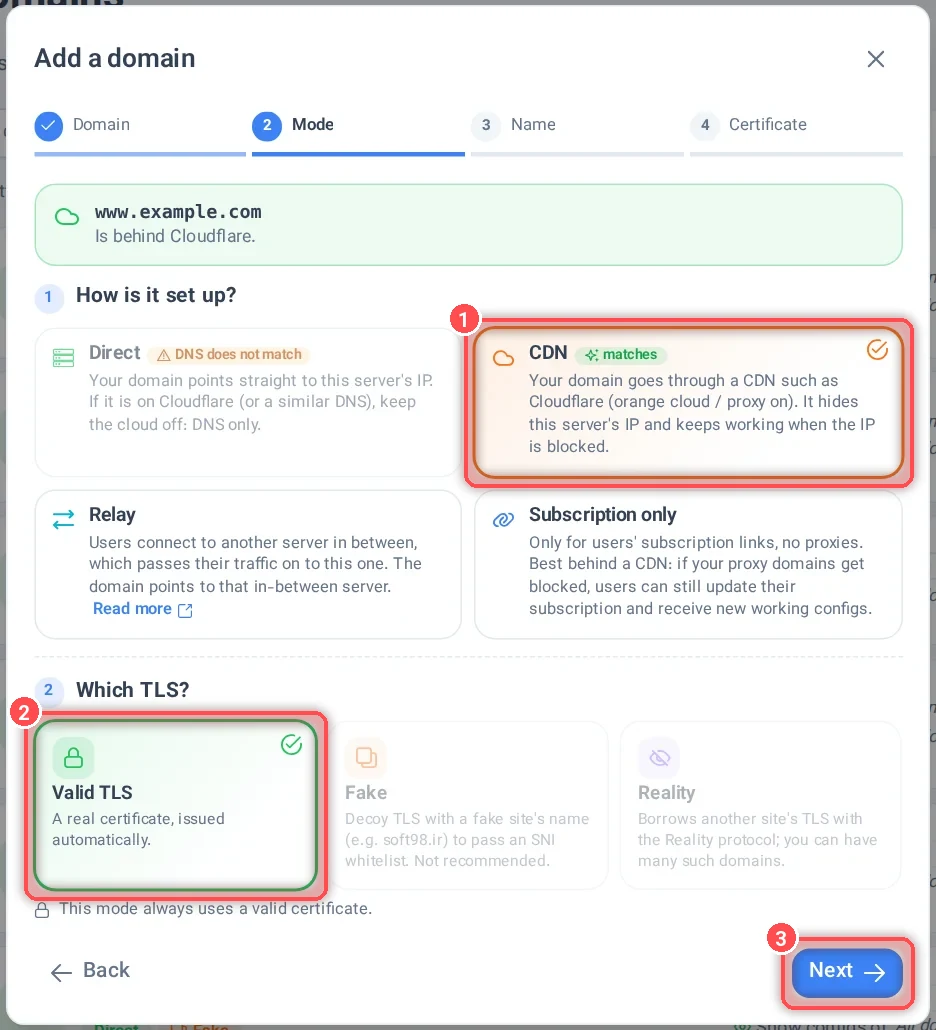
In the Mode step, under How is it set up?, choose CDN, keep Valid TLS and click Next.
-
Finish the Name and Certificate steps to add the domain.
If Show configs of on your user-page domain is set to All domains, the new configs are added to the subscription link by themselves. Ask your users to update the subscription in their app.