How to use the API of Hiddify Manager
Written for Hiddify Manager v14.5 (API v2.2)
Checked against the v14.5 panel. The endpoints can change between versions: the documentation inside your own panel (below) is always the one that matches it.
With the API you can manage the panel from your own programs or bots: create, change and delete users, read their usage, list admins and see the server's state.
Where is the documentation
In the panel, click API in the sidebar (in the Settings group). It opens the panel's own interactive API documentation: every endpoint, its fields, a Try it button, and ready request code for many programming languages. Its address is:
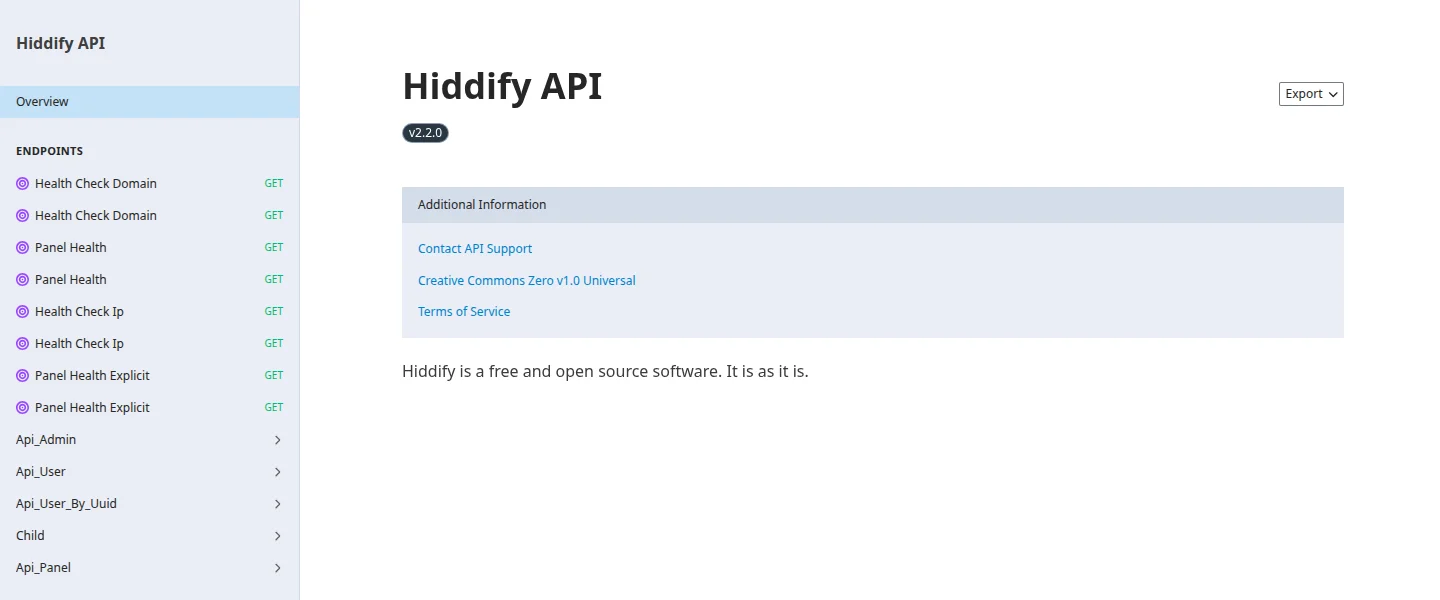
The documentation page in the panel lists every endpoint by section (Api_Admin, Api_User, Api_Panel, Child for nodes):
What you need
- Your domain and the admin proxy path: the part after the domain in your admin link (
https://<your domain>/<admin proxy path>/…). You can also see and change it in Settings › Very Advanced Settings › Proxy Path for Admins. - The API key: the UUID of an admin, the long ID in that admin's link (see the admin link and its format). Send it in the
Hiddify-API-Keyheader. The API acts with that admin's rights: an agent only sees its own users.
Keep the key secret
The API key opens the panel with that admin's rights, even when the admin has a password. Use a separate admin with only the rights your program needs, and send the key only over https.
The sections of the API (v2)
| Section | Base address | What it is for |
|---|---|---|
| Panel | /<admin proxy path>/api/v2/panel/ |
info/ (the panel's version) and ping/ |
| Admin | /<admin proxy path>/api/v2/admin/ |
users (user/), admins (admin_user/), your own admin (me/), server state (server_status/), logs and more |
| User | /<client proxy path>/api/v2/user/ |
for one user, with their UUID as the key: me/ (usage and time left), all-configs/, mtproxies/, apps/, short/ (a short temporary link) |
The client proxy path is in Settings › Very Advanced Settings › Proxy Path for Clients.
Common tasks
Addresses below are under /<admin proxy path>/api/v2/admin/. All of them are in the documentation of your panel, with their fields.
| You want to | Request |
|---|---|
| List, add, change or delete users | GET / POST user/, then GET / PATCH / DELETE user/<uuid>/ |
| Add many users at once | POST users/bulk-create/ |
| See the server's state (CPU, RAM, traffic) | GET server_status/ |
| Apply changes, reinstall, update or restart | POST apply/apply/, apply/install/, apply/update/, apply/restart/ |
| Download a backup | GET backup/download/ |
| See the outbounds | GET outbounds/ |
| See the nodes of a multi-server setup | GET nodes/ |
Examples
The panel's version:
The list of users:
Add a user with 30 GB for 30 days, with a monthly reset:
curl -X POST "https://example.com/ADMIN_PATH/api/v2/admin/user/" \
  -H "Hiddify-API-Key: ADMIN_UUID" \
  -H "Content-Type: application/json" \
  -d '{"name": "Ali", "usage_limit_GB": 30, "package_days": 30, "mode": "monthly"}'
The answer has the new user's uuid. With it you can read the user (GET …/admin/user/<uuid>/), change it (PATCH, only the fields you send) or delete it (DELETE). The mode is the reset period: no_reset, monthly, weekly or daily.
Notes
- Use version 2 of the API (
/api/v2/). Version 1 is old. - The fields and endpoints can change in a new version: after an update, check the documentation in your panel.
- The paths end with
/.
If you have a question or an idea for this page, write it in the comments below.